

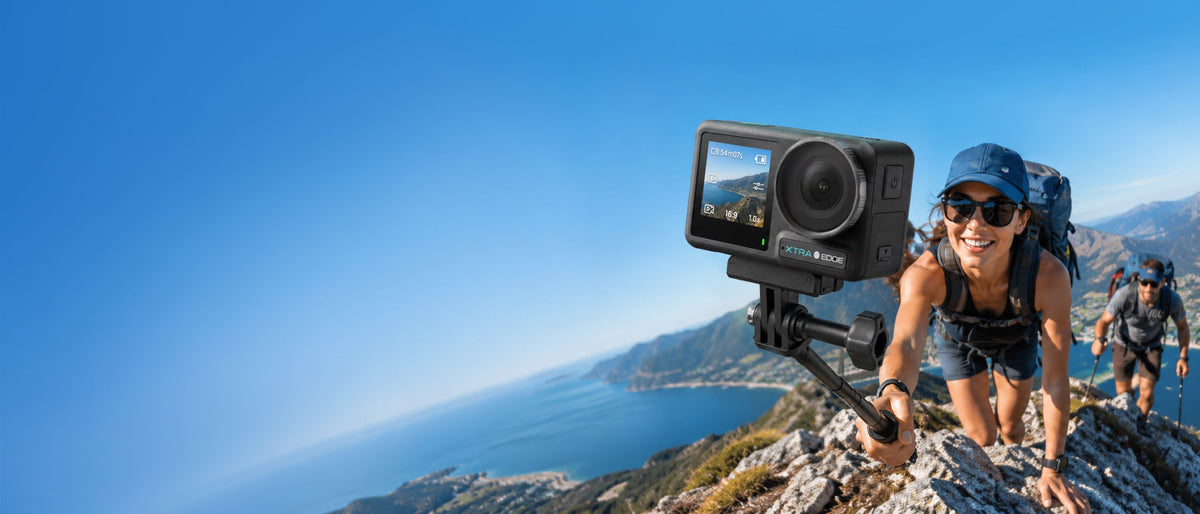
An action camera for vlogging works best when movement and location are part of the story. Its wide view can show a trail, bicycle, shoreline, or city walk without a large handheld rig. The difficult part is turning that wide footage into a clear sequence with intelligible speech.
This workflow covers the complete outdoor vlog: planning the story, choosing the camera position, recording sound, controlling movement, and organizing the edit.
Decide Whether an Action Camera Fits the Vlog
Choose an action camera when the camera will be mounted, exposed to weather, used near water, or carried through active scenes. It is also useful when a wide view helps the viewer understand the environment.
A pocket gimbal camera may be a better choice for face-first walk-and-talk footage, indoor scenes, or smooth optical movement with a narrower composition. A phone may be enough for quick stationary updates when weather protection and mounting are not important.
The choice should follow the footage. If the vlog includes cycling, hiking, paddling, skiing, or frequent transitions between handheld and mounted shots, an action camera has a clear role. If most of the video is a person speaking at arm's length, compare it with a pocket vlogging camera workflow before deciding.
Write a Short Story Before Recording
A vlog becomes easier to edit when every clip has a job. Write one sentence that describes the episode, then plan a beginning, a change, and an ending.
For a trail vlog, the sequence might be:
1. A short introduction that states the route and goal.
2. A wide establishing view of the location.
3. Two or three movement clips from different positions.
4. A close detail such as gear, terrain, food, or a map.
5. A brief update after the main event.
6. A final result or next step.
This is enough structure to prevent hours of disconnected footage. Record a few seconds before and after each action so the editor has room to cut.
Use Three Camera Positions Instead of One
Constant arm's-length footage becomes repetitive, even when the location changes. Build variety with three positions.
Direct to Camera
Place the lens near eye level and keep it far enough away to avoid exaggerated facial perspective. Look at the lens rather than the screen. Use the front display to confirm framing, then return attention to the scene.
Mounted Point of View
Use a chest, helmet, handlebar, or activity-specific mount for short first-person sequences. Keep the mount secure and confirm that hands, clothing, straps, or equipment do not block the frame.
Static Wide Shot
Set the camera on a stable support, enter the scene, and let the action move through the frame. A static shot can show scale and gives the viewer a break from continuous first-person motion. Protect the camera from traffic, unstable ground, waves, and other predictable hazards.
Keep Faces Away From the Extreme Edges
Wide-angle lenses make close subjects near the frame edge look stretched. Keep a face closer to the center and move the camera farther away before using digital zoom.
Leave space around the subject when the clip may be exported vertically. A shot framed too tightly for 16:9 can become unusable after a 9:16 crop. Record a short sample and check both formats before the main activity.
When the environment matters, resist the urge to fill the frame with the speaker. Let the location explain where the story is happening.
Record Cleaner Speech Outdoors
Good audio begins with distance. Wind reduction cannot make a distant voice sound close. For handheld speaking, keep the camera within a practical conversational range and turn the microphone area away from direct gusts when possible.
Use the internal microphones for short updates and ambient sound. For longer dialogue, connect a compatible external microphone and secure its cable or receiver. Monitor a test file with headphones before leaving the starting point.
Check four things:
- Voice level remains clear above wind and traffic.
- Clothing, straps, and cables do not rub against the microphone.
- The camera recognizes the external microphone after every connection change.
- Ambient sound is recorded separately when it helps establish the location.
Record ten seconds of natural sound at each major location. Those clips make edits feel continuous and can hide an audio cut without adding music to every moment.
Move in a Way Stabilization Can Support
Electronic stabilization works best with controlled movement. Bend the knees slightly, hold the camera close to the body, and turn with the torso instead of flicking the wrist. On a selfie stick, keep the extension only as long as the shot needs.
For mounted footage, fix loose hardware before changing settings. A flexing mount can create rapid vibration that electronic stabilization cannot fully correct.
Use 4K at 30 fps as a general starting point. Try 60 fps for faster daylight action or clips intended for moderate slow motion. At dusk, a higher frame rate can force shorter exposures or higher sensitivity, so compare it with 30 fps in the real scene.
Choose Color Settings for the Edit You Will Finish
A standard color mode is usually the fastest choice for same-day social clips. A log profile can preserve more grading flexibility, but it requires a deliberate conversion and color workflow.
Do not record in a flat profile simply because it sounds more professional. Test one clip from import through final export. Confirm that the editor, display, and delivery platform preserve the result you expect.
Match white balance and color approach across clips recorded in the same sequence. Large shifts between automatic settings can make a simple conversation harder to cut together.
How XTRA Edge Pro Fits Outdoor Vlogging
XTRA Edge Pro has front and rear OLED touchscreens, which support framing from either side of the camera. Its vertical recording option can capture a social-first composition without relying on a crop from a horizontal file. MotionMaster electronic image stabilization supports handheld and mounted action, while a triple-microphone array with wind-noise reduction handles camera audio. Compatible third-party microphones can also connect through a 3.5mm-to-USB-C cable.
XTRA Edge Pro is an XTRA product. This article uses manufacturer specifications and current store listings and does not present an independent laboratory test.
These features fit an outdoor vlog that shifts between direct-to-camera updates and active sequences. They do not remove the need to test microphone placement, supported recording modes, and the final vertical or horizontal export. Wind direction, subject distance, and mount movement still shape the result.
Organize the Edit While Copying Files
Copy the original files before deleting anything from the camera. Use folders that separate originals, project files, music or sound, and completed exports.
Build the first edit around speech and story order. Add movement clips only where they explain an action, shorten a transition, or show the location. A beautiful clip that does not serve the episode can be saved for another post.
Watch the complete export on a phone because that is where many viewers will see it. Check whether speech is clear through a small speaker, text stays inside safe margins, and wide details remain readable on a small screen.
Outdoor Vlog Checklist
Before recording, confirm the following:
1. The episode has a one-sentence purpose and a short shot list.
2. Both screens and the lens are clean.
3. The mount is secure and does not block controls or safety equipment.
4. A test file confirms framing, stabilization, and microphone input.
5. Storage and power cover the planned chapters.
6. The final aspect ratio is known before important framing decisions.
7. The original files will be backed up before cards or internal storage are cleared.
Finish One Useful Episode
The strongest first action-camera vlog is a short episode with clear sound and a simple visual sequence. Complete that project before adding more mounts, color profiles, or editing effects.
For broader purchase criteria, read the action camera guide for outdoor creators. To review current Edge Pro recording, audio, and mounting features, visit the official XTRA Edge Pro product page.

Leave a comment
This site is protected by hCaptcha and the hCaptcha Privacy Policy and Terms of Service apply.