

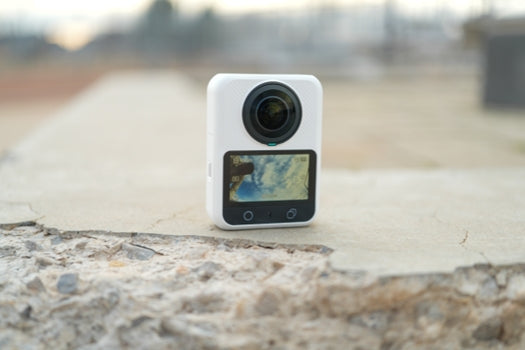
The fastest reliable workflow is simple: keep the original spherical file as your master, create separate 16:9 and 9:16 timelines, then reframe each version for its viewer. Do not finish a widescreen video and crop it three times.
One 360 capture can support YouTube, Instagram Reels, and YouTube Shorts because the master preserves every direction. The time savings come from reusing the capture - not from publishing three identical edits.
The Workflow at a Glance
- Record one clean 360 master with the full scene.
- Preserve the original file and make a verified copy.
- Create a 16:9 timeline for YouTube and 9:16 timelines for Reels and Shorts.
- Trim first, then reframe from the spherical master.
- Adapt the opening, pacing, captions, and ending for each platform.
- Export each version separately and watch the final file full-screen.
Choose the Output Before You Reframe
| Destination | Canvas | Story job | Opening priority |
|---|---|---|---|
| YouTube | 16:9 | Context, route, explanation, or longer sequence | Establish the location and direction clearly. |
| Instagram Reels | 9:16 | One visually immediate moment | Show the subject or strongest visual at once. |
| YouTube Shorts | 9:16 | One question, move, surprise, or payoff | Make the next few seconds easy to understand. |
Reels and Shorts share a vertical canvas, but they do not have to share the same cut. A Reel may emphasize atmosphere or a smooth reveal; a Short may work better when it reaches one answer or payoff sooner.
Capture a Master That Is Easy to Reframe
- Use panoramic 360 video when you want post-shoot angle freedom; single-lens video records a chosen direction instead.
- Keep the main subject at least 0.7 meters from XTRA 360 when possible, and avoid placing a close face or object on the stitch line.
- Keep the selfie stick straight and level with the camera so it sits in the stitching area and is less visible in the final view.
- Clean both lenses before recording. One fingerprint or water spot follows every later export.
- Start early and hold for two or three seconds after the action. Those handles make clean openings and endings much easier.
Build the Three Versions in Six Steps
1. Preserve the spherical master
Copy or download the original 360 file, give it a clear project name and date, and keep it unchanged. If the footage matters, make a second verified copy before editing. Every future angle and aspect ratio depends on that master.
2. Create separate timelines
Make one 16:9 project and two 9:16 projects. If the current Xtra app does not offer every canvas you need, export a clean reframed clip and finish the platform-specific canvas in another editor. Follow the workflow, not a button name that may change with an app update.
3. Trim before adding viewpoint movement
Remove accidental starts, long waits, and footage after the action ends. Trimming first prevents you from placing keyframes on material that will be deleted. Keep a little extra at both ends until the final pacing pass.
4. Reframe with fewer, better moves
Set a stable first view, then add a new framing point only when the subject moves or the story needs another direction. Tracking can be a useful starting point, but review the full result. Replace any drift, wrong-subject lock, or awkward stitch crossing with manual framing.
5. Give each platform a distinct first promise
- YouTube 16:9: open wider when location and route matter; hold shots longer for narration or context.
- Reels 9:16: center one subject quickly, preserve room for interface elements, and use the strongest visual rather than the YouTube introduction.
- Shorts 9:16: build around one question or payoff, remove setup that only works in the longer video, and end when the idea is complete.
6. Add text after reframing, then export separately
Place captions and graphics only after the angle and aspect ratio are stable. Keep text clear of interface-heavy edges, then export from each timeline at the highest practical quality. Watch the actual files from beginning to end and check the first frame, every viewpoint move, stitch quality, caption position, audio sync, orientation, and final frame.
Example: One Ride, Three Stories
Imagine one clip of a cyclist approaching a scenic overlook, turning toward the view, and reacting.
YouTube: Begin with the trail and landscape, follow the approach, then turn toward the reaction. The edit explains where the rider came from and why the stop matters.
Reels: Open on the view or the rider entering the overlook, then use one smooth reframe to connect movement and reaction. The edit prioritizes visual impact.
Shorts: Open with a question such as "Was the climb worth it?" Show the final approach and land on the view. The edit prioritizes a quick, complete payoff.
Common Mistakes to Avoid
- Cropping a finished 16:9 export into vertical instead of returning to the spherical master.
- Adding constant pans or too many keyframes when the subject is already readable.
- Placing captions before the final aspect ratio and later cropping or covering them.
- Deleting the master after the first export.
- Treating Reels and Shorts as automatic duplicates instead of checking the opening and payoff.
Frequently Asked Questions
Do I have to edit 360 video before sharing it?
For a standard flat social video, yes. Reframe the spherical footage into a view such as 16:9 or 9:16. Interactive 360 publishing is a different viewing experience from the platform-specific edits described here.
Should I make 16:9 or 9:16 first?
Start with the version that serves the main story. A narrated sequence may begin in 16:9; one immediate visual moment may begin vertically. Create the other versions from the master, not from the first export.
Can Reels and Shorts use the same edit?
They can, but a duplicated vertical timeline with a revised opening, pacing, text, or ending is often clearer. Reuse the work without forcing both platforms to tell the story in exactly the same way.
The Bottom Line
Treat the spherical file as a reusable master. Choose the canvas first, reframe for the viewer's screen, and let each edit make one clear promise. The goal is not three identical files; it is one efficient capture that produces three intentional stories.
Related guide: Motovlogging for Beginners: Plan, Film, and Edit Your First Ride in 2026
Shop XTRA 360

Leave a comment
This site is protected by hCaptcha and the hCaptcha Privacy Policy and Terms of Service apply.